This article on basic life support is an excerpt taken from our NREMT Test Prep program. You can learn about the full course here.
Sometimes despite our best efforts patients continue to decompensate. In basic life support, we struggle to work against the clock to get our patients resuscitated and turned around. Unfortunately, this does not always work out the way we would hope.
As experts in resuscitation, we are called upon to know what to do in the worst-case scenario. We need to know how to intervene and what to do even when all seems lost. Families and loved ones will look to you in their most dire hours. This is why basic life support is so vitally important as a part of the first responder skill set. Even when the worst happens and our patients lose their pulse, we still know what to do. So, let’s talk about BLS.
Basic life support is arguably the most important set of skills you need to have mastered as an EMT or Paramedic.
The advanced skills involved in your expertise mean nothing if you can’t perform good quality CPR. Only two things have ever been proven time and again to make any real difference in survival when it comes to patients in cardiac arrest. Good quality chest compressions and early defibrillation. I might be able to intubate someone upside down and backward but if I can’t perform good quality CPR and know how to operate an AED or defibrillator, what’s the point?
Before You Start Basic Life Support
Before we start CPR we want to make sure the scene is safe and put on our appropriate personal protective equipment. Two victims are worse than one so we want to make sure to protect ourselves so that we do not become a victim as well. Next, we want to establish whether or not our patient has a pulse by checking for a carotid pulse for no more than 10 seconds. We look for a carotid pulse since the carotid pulse is the closest to the heart and will be the last pulse to disappear as the patients decompensate. We then want to begin good quality chest compressions.
Chest Compressions
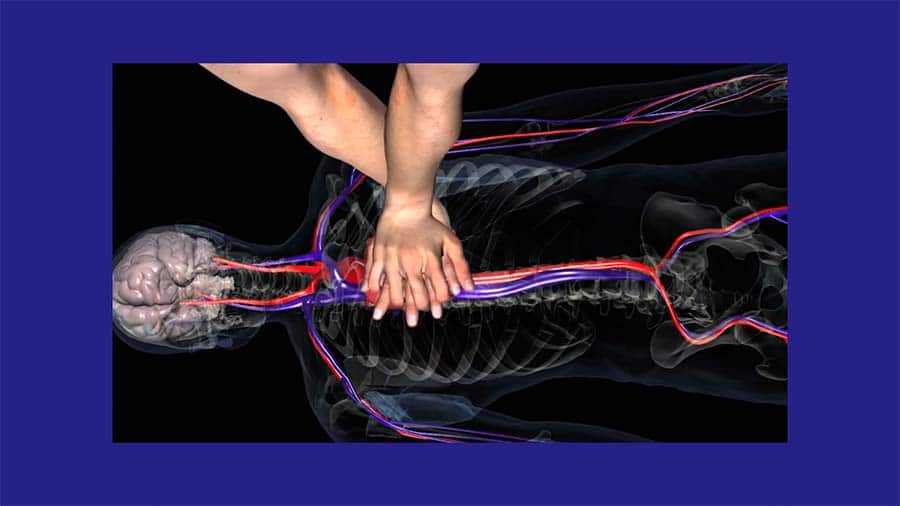
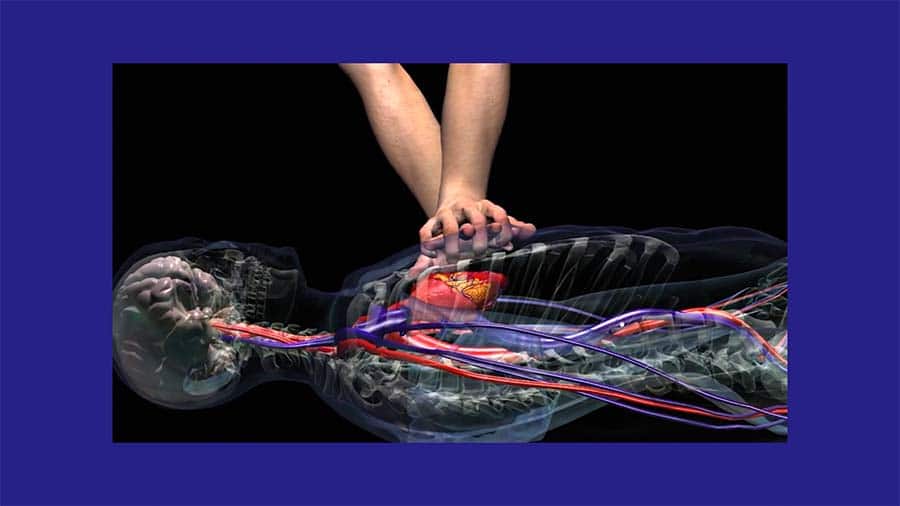
Good quality chest compressions involve 3 components. 1) appropriate rate 2) appropriate depth and 3) full chest recoil. Chest compressions should be at a rate of 100-120 compressions per minute. This has been shown to be an appropriate rate to build up enough pressure in the circulatory system to perfuse the heart.
The depth of compression should be 2 inches or about 1/3 of the chest wall. We are using the rib cage to squeeze the heart and so appropriate compression depth is important as too little depth won’t adequately compress the heart. Full chest recoil is very important because of when the heart itself gets its own blood supply. Remember, the coronary arteries supply blood to the heart muscle. In order for a heart to start beating again, it has to have enough blood flow to its tissue. This is the whole point of CPR. Providing adequate blood flow to the heart itself so it can begin beating again.


Coronary perfusion pressure is what we are trying to maintain during CPR. When the heart is contracting the coronary arteries are squeezed and blood does not flow through them. It is when the heart relaxes that the coronary arteries are able to relax and deliver blood to the heart tissue. So during systole, the heart pumps blood to the system and during diastole it receives its own blood supply. This is why allowing for full chest recoil during CPR is so important. It allows the heart to fully relax and thus receive blood from the coronary arteries.
Ready to learn CPR? Find an American Red Cross course in your area.
Defibrillation
We said that other than good chest compressions, the only other thing that has been shown to save lives during cardiac arrest is early defibrillation. In basic life support, we rely on the AED to let us know whether a patient needs to be defibrillated or not. In advanced cardiac life support, we interpret the rhythm ourselves in order to determine whether or not it is shockable. Understanding the underlying role of the defibrillator and what we are doing during defibrillation is important regardless.
During defibrillation, we are administering an electrical current to the heart in order to stop the heart so that its own intrinsic conduction pathway, starting with the SA node can begin firing again which we hope will get the heart to start beating again. We’re not “jump-starting” the heart, but rather stopping the heart completely so that the cardiac conduction system can take back over. This is why we don’t defibrillate someone in asystole or a flatline. In asystole there is no heart motion at all so stopping an already stopped heart doesn’t do us any good.

Ventricular fibrillation and ventricular tachycardia
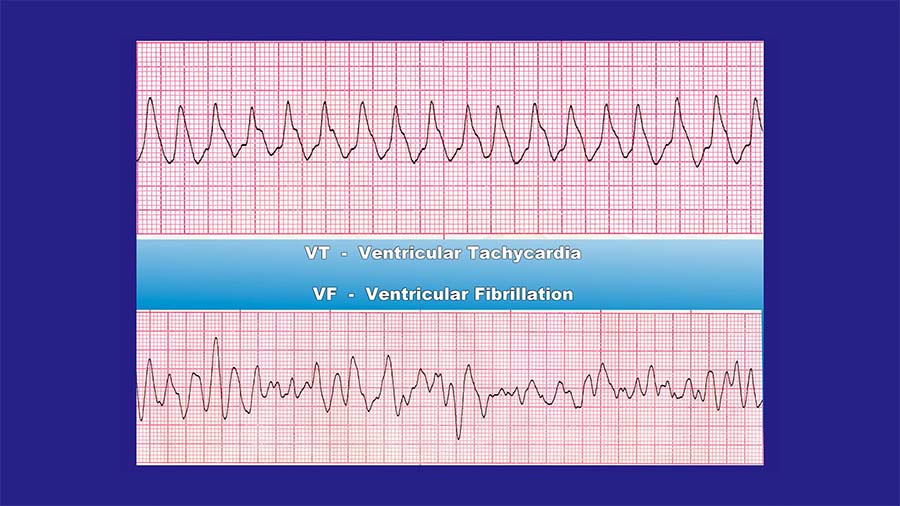
There are two rhythms however that we want to stop. These rhythms are identified by the AED or by the medic himself and defibrillation is used to stop them. They are ventricular fibrillation and ventricular tachycardia without a pulse. In ventricular tachycardia without a pulse and in ventricular fibrillation, the cardiac conduction system is not working properly. Instead of electrical impulses traveling from the SA node to the AV node and then to the Purkinje fibers, each cell is firing at its own intrinsic rate.
We called this automaticity and if you remember we said that every cell of the heart has the ability to conduct its own electrical current. When all of the cells of the heart are doing this we have ventricular fibrillation, and the heart is just quivering or shaking. This is not enough for the heart muscle to squeeze and deliver blood to the system. In ventricular tachycardia, a similar process is occurring. The heart is beating too fast to actually cause any significant squeezing to occur. The difference is that not all of the cells are firing at their own intrinsic rate, but a locus of electrical current in the ventricles is causing the heart to beat too rapidly to support circulation.
Regardless, both of these rhythms are not able to create a pulse and the patient’s heart needs to be stopped with a defibrillator in order to give the SA node a chance to take over once again. This is what the AED or the medic is trying to recognize. If a patient’s heart is found to be in ventricular fibrillation or ventricular tachycardia without a pulse, early defibrillation is critical to decrease mortality and re-establish a pulse.
Tips for Using an AED (automated external defibrillator)

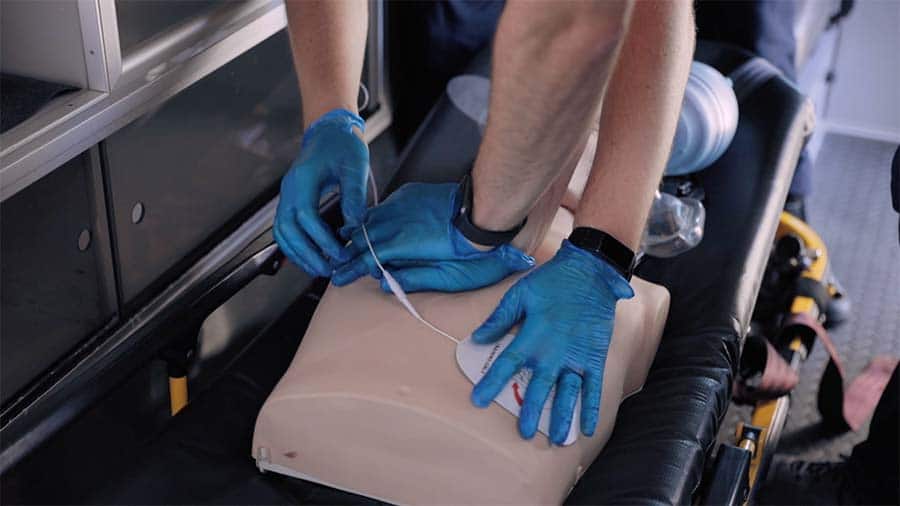
There are a few things we want to cover regarding the use of an AED. You can always use bigger pads but never smaller pads on the patient. This means that if you have adult pads and you are performing BLS on a child, you can still use the pads, placing one on the back of the patient and one on the front. However, if you only had child pads and were performing CPR on an adult, you should not use the pads as they do not create enough of a current and will only delay chest compressions.
AEDs and water
AEDs can be used when a patient is wet. Do your best to wipe the patient off if they are wet, but AEDs don’t deliver a bolt of lightning that electrifies all the water around it. If a patient is submerged in water make sure to remove them and dry them as best you can, but the AED can still be used even if the patient remains slightly wet as long as their chest is relatively dry. Defibrillators do not conduct enough electricity to supercharge metal.
AEDs and metal
AEDs should not be put over the top of metal such as nipple rings or necklaces etc, but there’s no need to go tearing off people’s nipples in fear of burning the patient. Even if you yourself are accidentally touching the patient when the defibrillator goes off, other than getting a little shock, your heart’s not gonna stop and you won’t be blown across the room. The real risk is to the patient. If the patient does not get the full charge of defibrillation, it will not have the effect we desire.
AEDs and body hair
Another problem you may run into is that it can be difficult to adhere the pads to hairy chests. Use a razor to quickly shave the areas needed for placement of the pad. Finally, if a patient has an internal defibrillator or pacemaker, the AED can still be used. Place the pad under the internal device and continue as you would in someone who did not have one. Their internal device is not working properly since they are in cardiac arrest, and the use of the AED is important to increase the chance of survival.
Airway Management in Basic Life Support
Once we have assured that we are performing good quality chest compressions and tried to administer early defibrillation, if indicated, we can start to consider airway management. Administering breaths during CPR is not as important as good quality chest compressions and early defibrillation. Hands-only CPR works remarkably well in resuscitation and decreases morbidity and mortality of cardiac arrest.
We used to believe that once blood circulated through the body it was completely depleted of oxygen. We now know that hemoglobin, the oxygen-carrying protein in our red blood cells, can actually hold about 4 molecules of oxygen. As blood circulates, only one or two of these oxygen molecules are exchanged in the tissues which means that we can circulate blood a few times before our red blood cells are totally depleted of oxygen. Also, as we compress the chest during CPR it creates a negative pressure gradient so as we allow for chest recoil some air is being pulled into the lungs. This is most likely enough to load a few oxygen molecules onto our hemoglobin which is why hands-only CPR without any rescue breathing or airway management has proven to be successful in resuscitating patients in cardiac arrest.
Now, as professional first responders, it is in our scope of practice to manage a patient’s airway and so we will have to attempt to add airway management to our BLS skill set. Remember though, the airway should always be secondary to good quality chest compressions and early defibrillation.
CPR Rescue Breathing
CPR rescue breaths are given two at a time after 30 compressions have been completed. This is for the adult patient in cardiac arrest. 30 compressions for two breaths. This also holds true for children if you are by yourself, however, if two rescuers are present, and your patient is a child, we reduce the compression to breath ratio to 15 to 2. 15 compressions for every two breaths.
The reason is that most cases of cardiac arrest in children are due to respiratory arrest that occurs first. Children don’t have 20 years of eating Big Macs and Whoppers behind them to give them coronary artery disease. Typically, if a child goes into cardiac arrest it is because they stopped breathing first. Rescue breaths should be given each over 1 second. A normal-sized breath is administered. No need to take a huge deep breath here. We watch for the chest to rise as a sign that the breaths are adequate. If you do not see the chest rise, readjust the airway and attempt your second rescue breath. If the chest still does not rise continue with compressions.
BVM Hand Position
Hand position plays a critical role in making sure the breath is delivered to the lungs and doesn’t escape around the mask. Make a C E with your hand, use your thumb and index finger to push down on the mask to create a good seal. The rest of your fingers create an E and grasp the jaw to pull the jaw forward while your other hand tilts the head. Again, the airway comes secondary to good quality chest compressions. If you are having trouble getting a good seal with the mask or administering breaths that cause the chest to rise, do not delay restarting your compressions.
Re-evaluate
A full round of CPR is 5 cycles of 30 to 2. Every two minutes we take no longer than 10 seconds to reevaluate whether our patient has a pulse or not. If they don’t have a pulse or if you’re unsure as to whether they have a pulse, we will restart CPR starting with compressions. If you find that your patient does have a pulse during a pulse check, continue with rescue breaths as needed, 1 breath every 5-6 seconds which is 10-12 breaths per minute. Continue to monitor the patient’s pulse so that you are ready to restart chest compressions if the pulse disappears.
